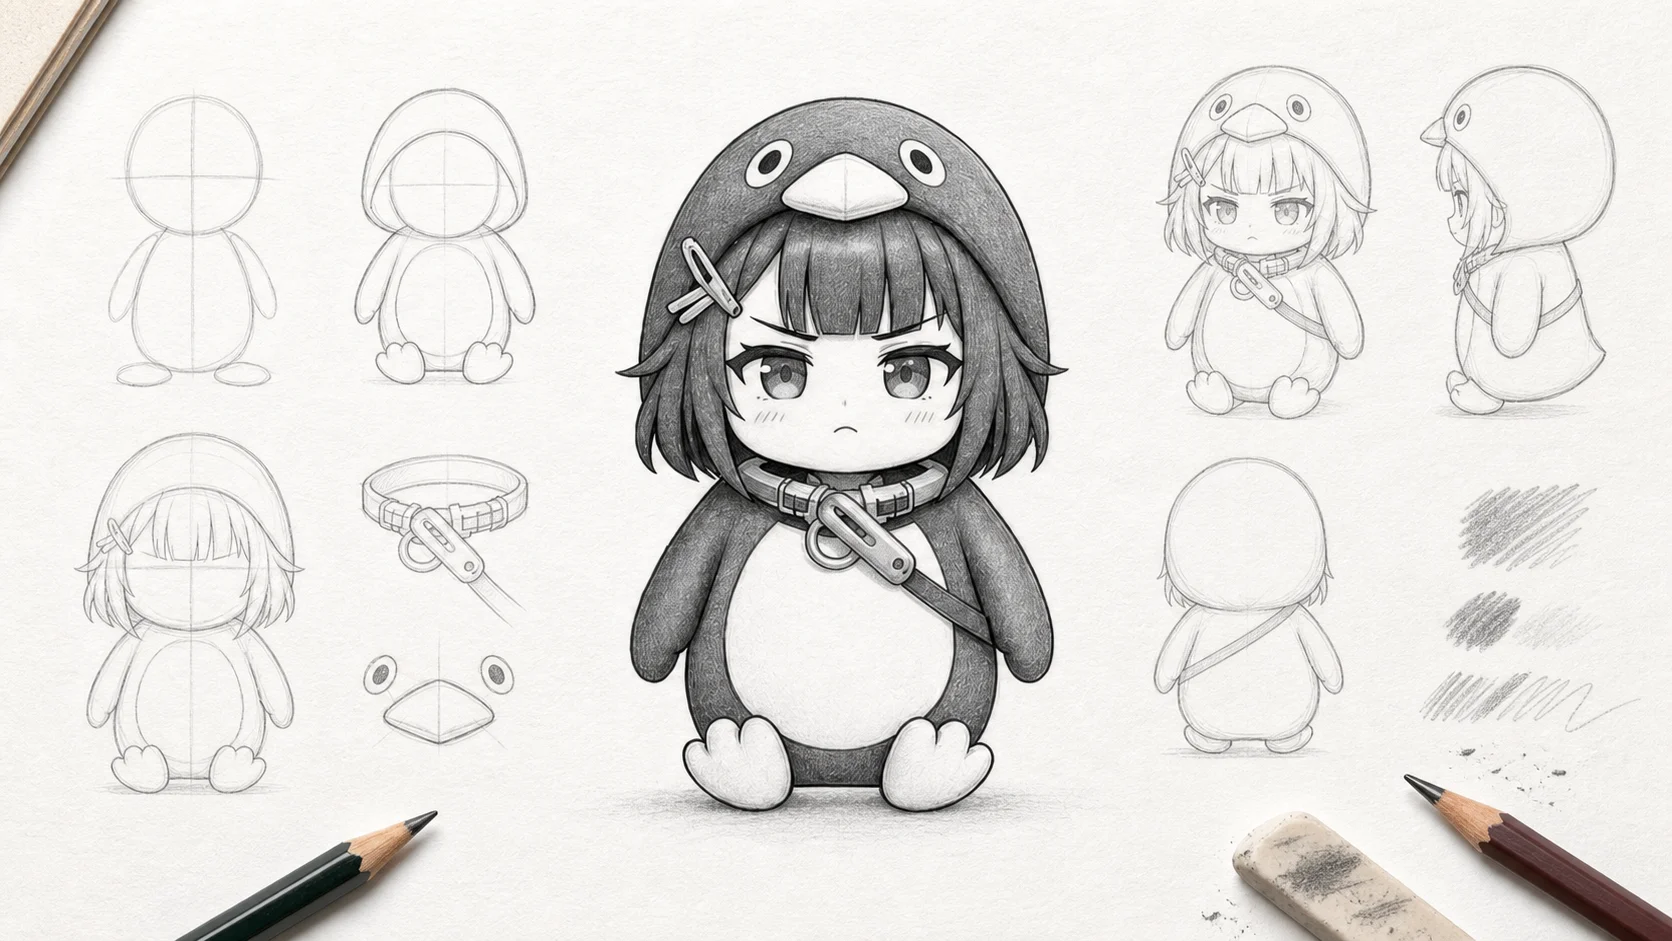
How to Draw the Gugu Gaga Penguin by Hand: Step-by-Step Sketch Guide
This is a hand-drawn tutorial — pencil, pen, or digital tablet — for the chibi penguin character (Endmin / Penguinistrator) from the Arknights: Endfield fan-art community. No AI generator needed. If you'd rather animate the character in a short AI video, see the AI video tutorial instead — different intent, different workflow.
Disambiguation: this is the AI penguin meme from Arknights: Endfield (Endmin / Endministrator) — not the D Billions "Aaa Aaa Gugu-Gaga" kids song or the Goo Goo Gaga Santa Claus chocolate meme.
Sketch steps reflect community-canonical proportions and silhouette cues. The character is fan-canon; Hypergryph has not issued formal design references for the meme form.
Sources: Arknights: Endfield official site · r/Endfield community fan art
AI-assisted sketch illustrations, curated by gugugagapenguin.com. Step images shown in this tutorial are generated with Nano Banana Pro (Google's Gemini 3 Pro Image, SynthID watermarked) in pencil-sketch style, then reviewed by the editorial team.
How these illustrations were made
Each step image was generated with Nano Banana Pro using a 3-view character reference turnaround, prompted in pencil-sketch style on white paper with construction lines visible. No retouching beyond cropping. The character design is fan-canon — Hypergryph has not issued a formal reference sheet for the meme penguin form.
What You'll Need
Pick one path. Both work — the steps are identical. Use what you already have; this is fan art, not a commission.
Pencil & paper
- HB or 2B pencil for construction lines
- 0.5mm fineliner or fine-tip pen for final lines
- Yellow + black colored pencils or markers (optional, for accents)
- A4 or letter-size paper, smooth or lightly textured
- Soft eraser
Digital tablet
- Any tablet (iPad + Procreate, Wacom + Photoshop, Krita, etc.)
- Hard round brush for construction (low opacity)
- Inking brush with stabilization for linework
- ~1500×1500 canvas, 72-300 DPI is fine
Skill level: beginner. If you can draw a circle and a rounded triangle, you can finish this in 30-45 minutes.
The 8 Steps
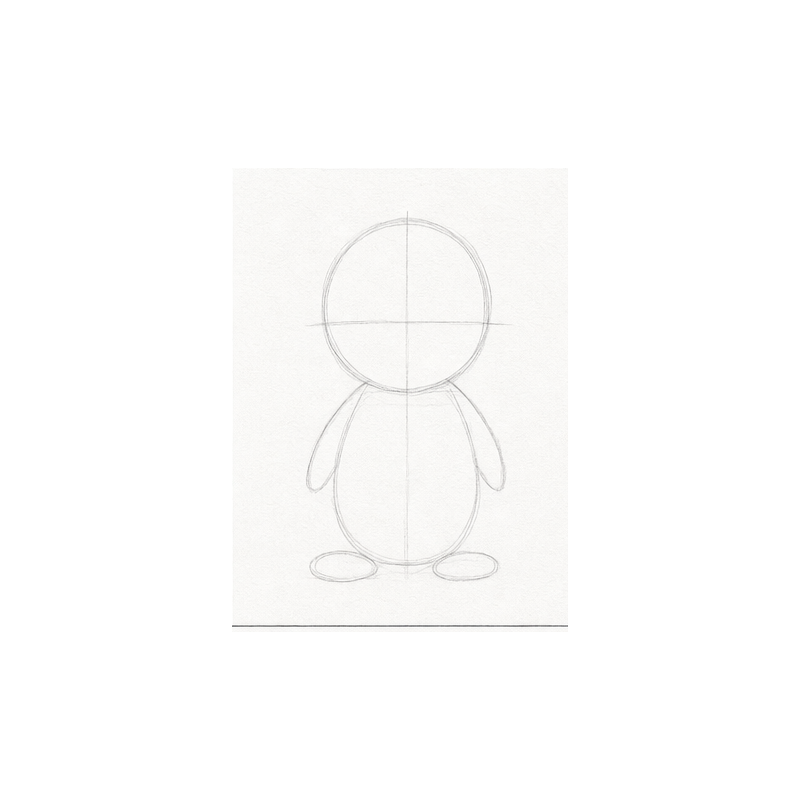
Step 1 — Construction lines
Start with construction guides — a big oval for the body (wider than it is tall, about 2.5 heads tall total), a circle for the head, and faint cross-hatch guides for proportion. The Endmin penguin reads as chibi because the body proportion is short and round. Resist the urge to make her tall.
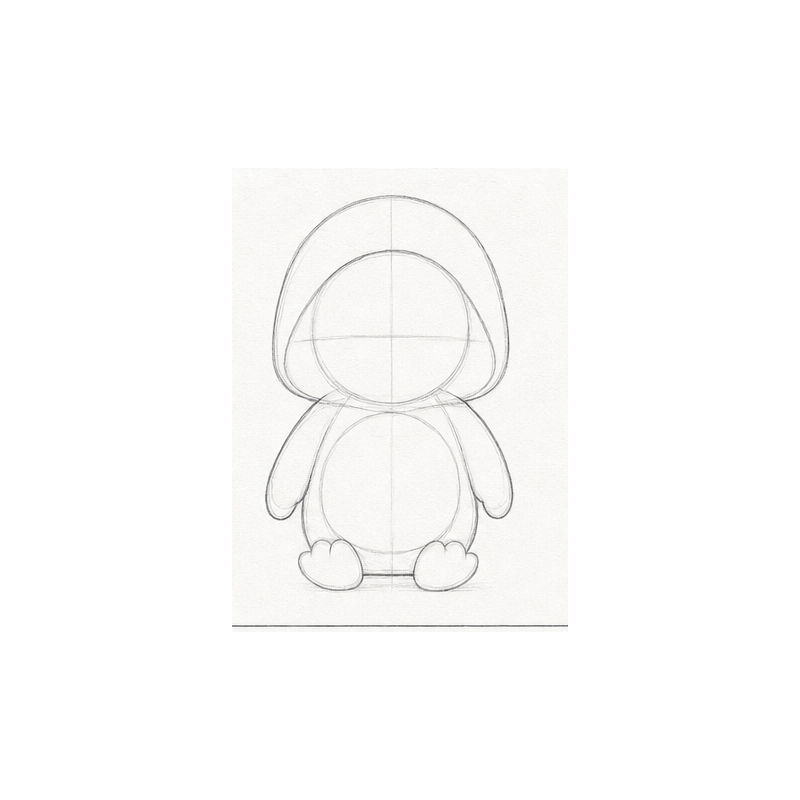
Step 2 — Rough silhouette
Block in the rough silhouette over the construction guides — the outer outline of the body + coat. The silhouette of the coat is what makes the penguin read work — keep it slightly flared at the bottom. Don't worry about face details yet.
Step 3 — Head & face blocks
Place the face roughly 1/3 down from the top of the head. Block in where the eyes and mouth will go — two dots spaced about an eye-width apart, a small mouth shape between and slightly below. Keep it as planning marks; refine in the next step.
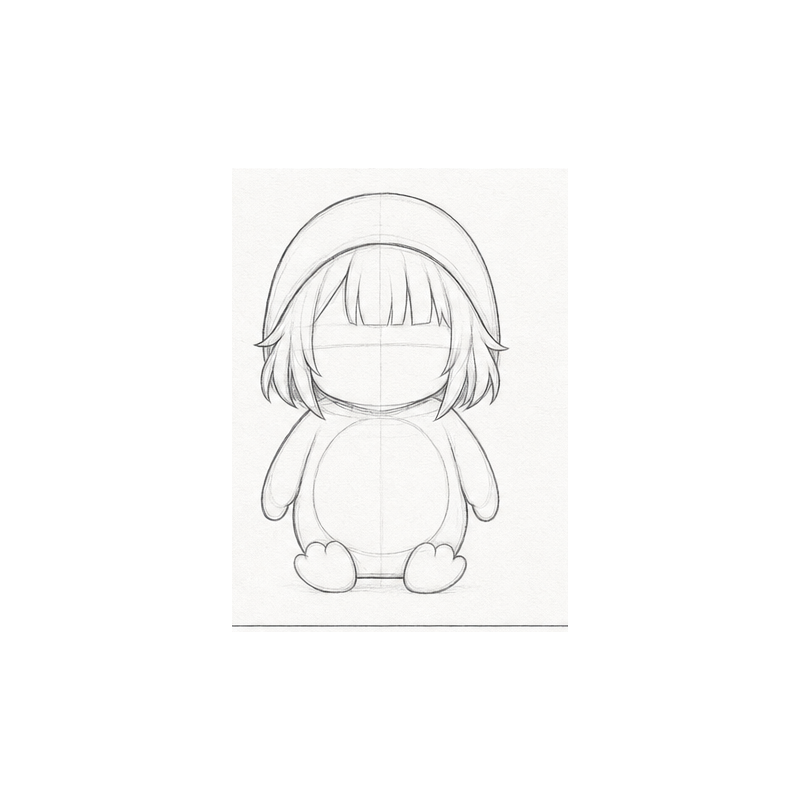
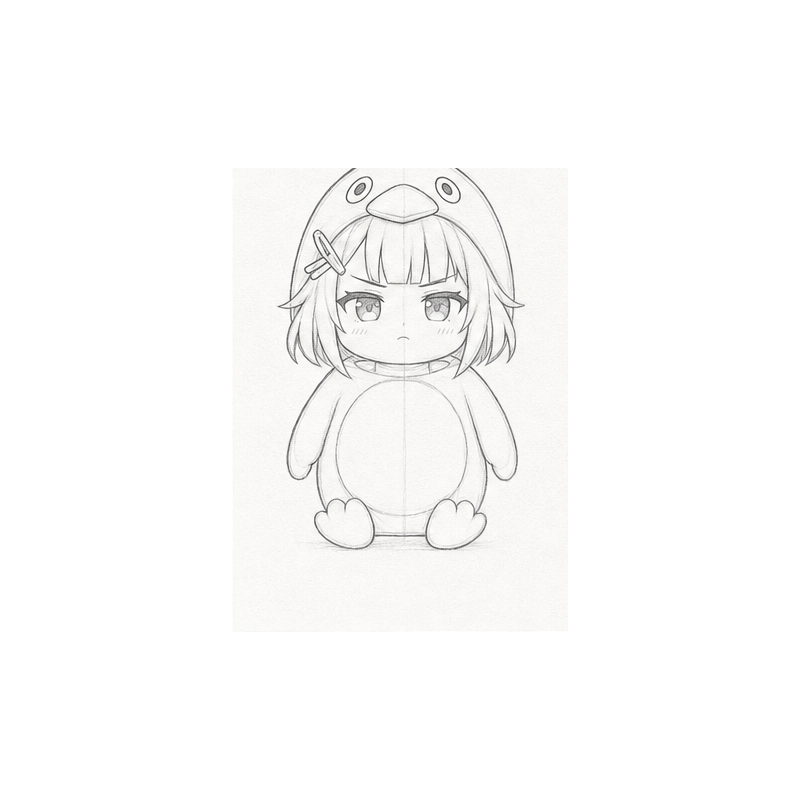
Step 4 — Facial details
Refine the eyes and mouth. Two solid dots for eyes, a small soft curve for the mouth. Resist over-detailing — eyelashes, blush, and lip detail are all off-meme. The face must stay simple to read clearly at small sizes (sticker thumbnails, social posts).

Step 5 — Penguin features
Add the penguin-specific shape cues — body roundness, the slight forward lean of the head, and the small paw position (tucked into the coat or one raised in a small wave). Avoid action poses — they're off-meme. The chibi reads best with a straight-on, slightly tilted head and a quiet hand.
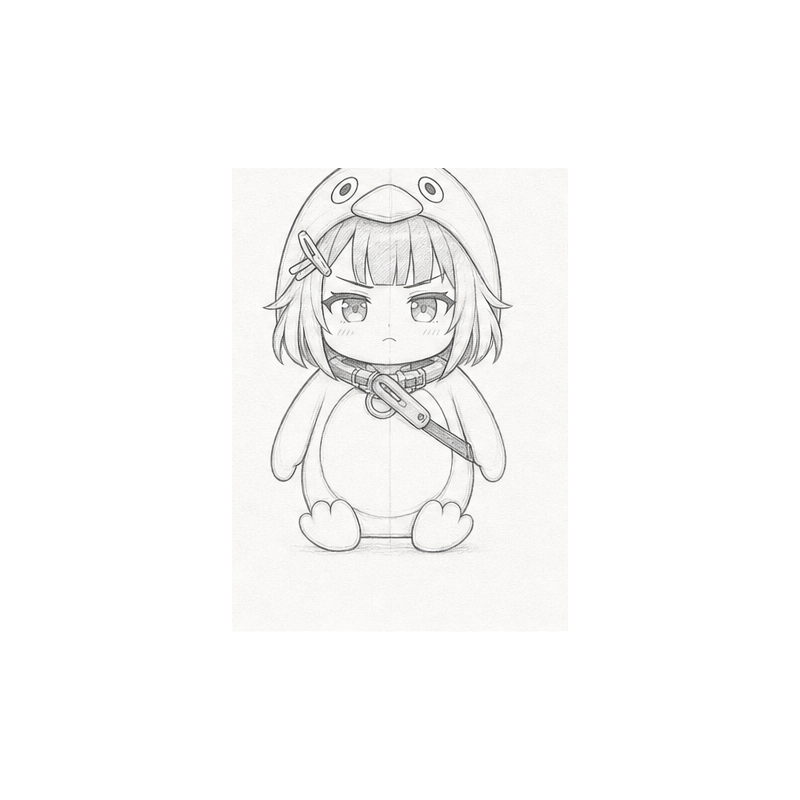
Step 6 — Coat & gear details
Block in the long black outer coat plus the bright golden-yellow inner lining + shoulder accents. The yellow is bright golden, not orange. These accents define the silhouette from a distance — they're what makes the chibi instantly recognizable.
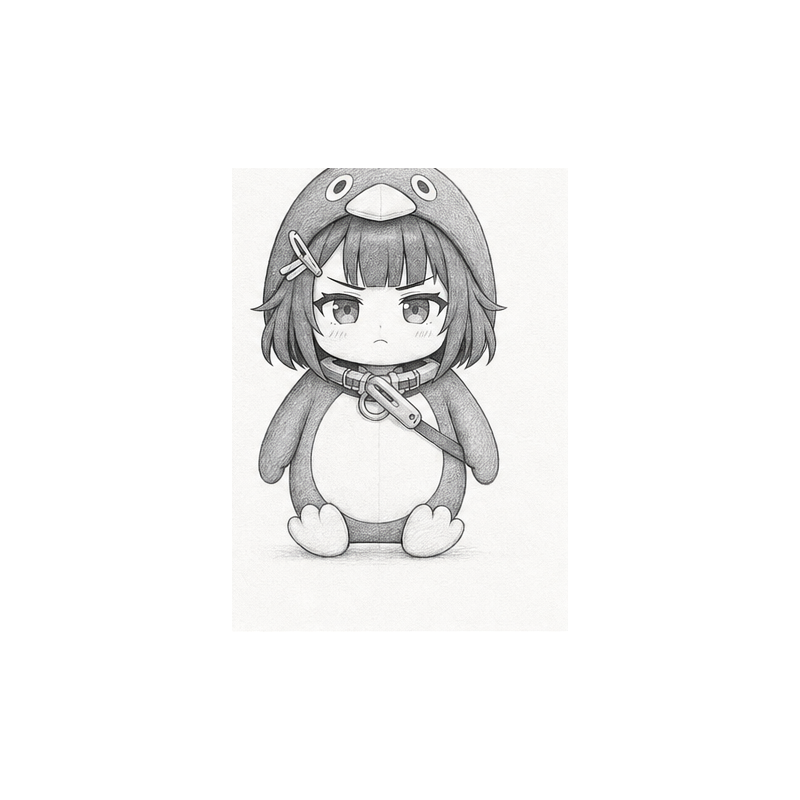
Step 7 — Shading & refine
One soft light direction — typically upper-left. Shade the right side of the body and the underside of the coat hem. Keep shading soft; over-rendering reads as commission art, not fan art. Refine any line weights at this stage.
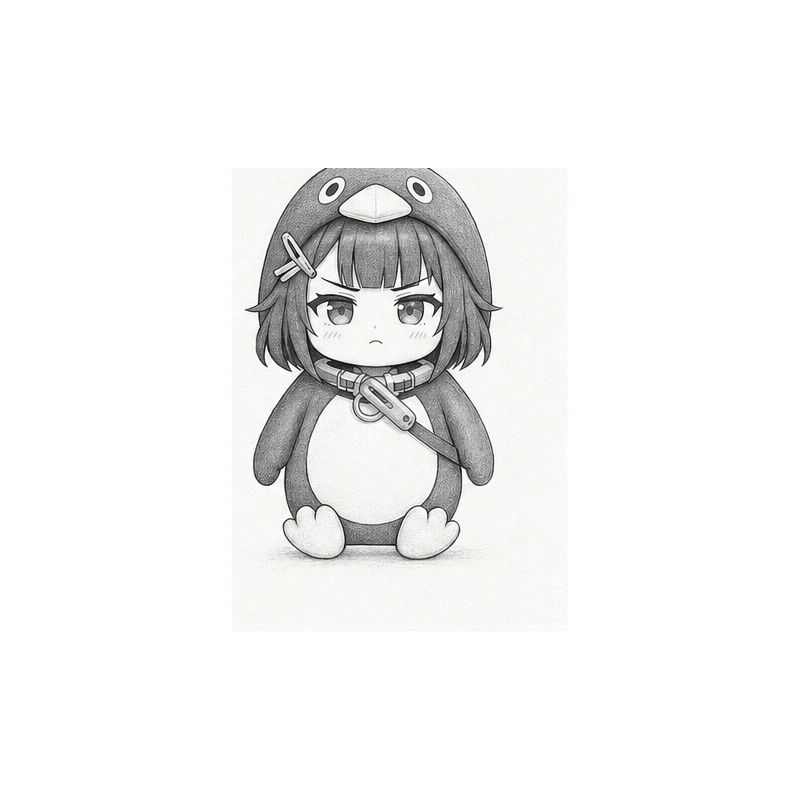
Step 8 — Finalize
Erase or hide all remaining construction lines. Clean up stray pencil marks. The final character should read cleanly at a glance — confident silhouette, golden-yellow accents, and the recognizable chibi penguin proportion. Optionally ink the final lines with a fineliner.
Bonus: Printable 8-panel Cheat Sheet
All 8 steps + the finished example on one printable page. Tape it to your tablet stand or wall for fast reference.
Download cheat sheet (PNG, 1536×1024)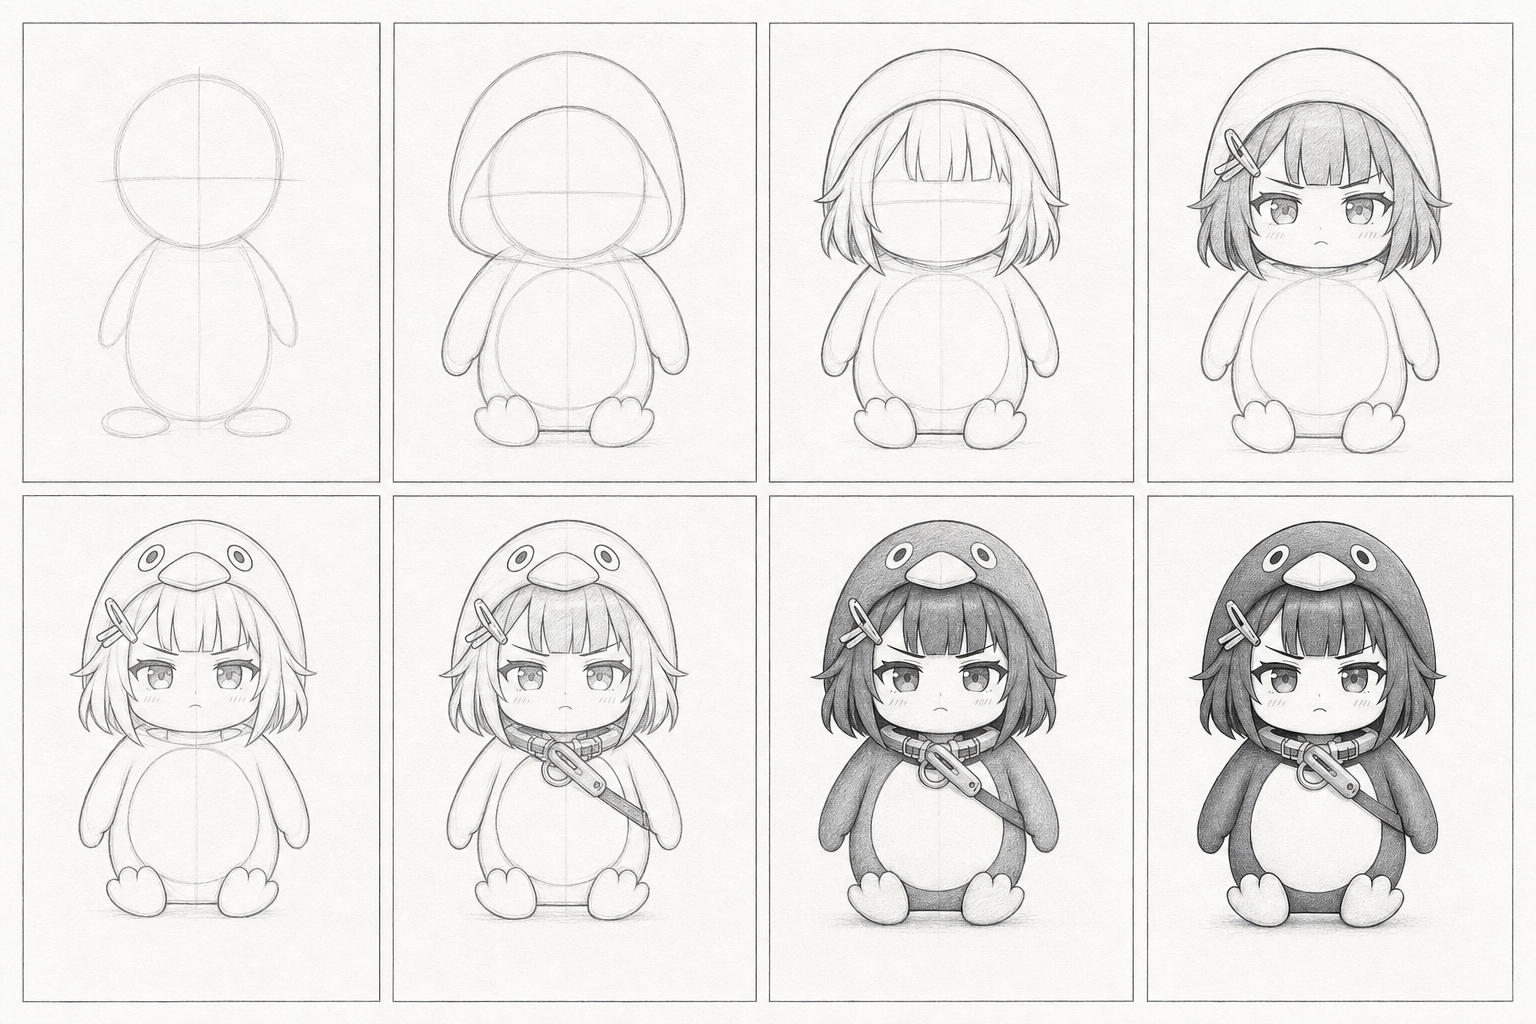
Free for personal use. Reposts welcome with a link back. Fan-made — not affiliated with Hypergryph.
Common Mistakes & Stylization Tips
Common mistakes
- Tall proportions — drawing her as a slim adult kills the chibi read. Lock proportions at 2.5 heads tall.
- Orange-shifted yellow — the accent is bright golden, not warm orange. Compare against a reference if outputs look orange.
- Over-detailed face — two dots + a small mouth is the whole face. Eyelashes, blush, lip detail = off-meme.
- Symmetrical mirror pose — the slight head tilt and asymmetric hand position are part of the recognizable read.
- Heavy linework — thick uniform lines flatten the form. Vary line weight slightly at shadow edges.
Stylization tips
- Sticker variant — add a thick white outline around the finished drawing for a sticker look (great for Discord / Telegram pack work).
- Sketch sheet — draw 4 versions on one page with different expressions (neutral / pouting / smug / surprised). Useful for character sheets.
- Color study — try a single-color flat fill instead of shading. Reads as poster art and works well at small sizes.
- Construction reuse — once you have steps 1-3 down, you can reuse the silhouette for any pose. Most of the variation lives in the coat hem + hand position.
Common Questions
How long does this take for a beginner?
30-45 minutes start to finish. The construction (Steps 1-3) is the slowest part; once the silhouette is in, the rest moves quickly.
Do I need an art tablet?
No. Pencil and paper work fine for every step. A tablet is convenient for undo and clean linework but not required.
Can I sell my drawing?
The character is from Arknights: Endfield (Hypergryph). Personal fan art is community-accepted; commercial sale enters Hypergryph's fan-content policy territory. Check the official policy before listing on Etsy or similar.
What if I want to animate her?
Different workflow — see the AI video tutorial. It covers the image-to-video pipeline using a single still as the source frame.
Where can I find a reference for the official design?
Hypergryph has not issued a formal reference sheet for the chibi penguin meme form — it's fan-canon. See the Endmin Penguin Guide for the design checklist and the full character profile for visual-design analysis.